Digitising PAL / NTSC / SECAM media
In 1984 we got our first video camera, a Panasonic PK-958 and thus started 20 years of recording analog video in various formats. Moving around the world and having different equipment meant that the collection now includes several incompatible physical formats such as VHS, SVHS, Hi8, MiniDV as well as recordings in several different analog formats, namely PAL, NTSC and in my case also a smidge of MESECAM (which is a bit different to SECAM).
The problem, of course, is that working playback equipment is getting scarce (the belts eventually break, the circuitry eventually fails) and the physical media deteriorates over time. The solution is to digitise it and to do it soon since every day that goes by is more deterioration and more risk of not having the right playback equipment.
Digitising is a very time consuming process since 1 minute of video takes more than 1 minute to digitise when you consider the full end-to-end process, so it's worth getting done right the first time.
The COVID lockdown was a good opportunity to capture this media, some of which I put on YouTube so others could enjoy this vintage media.
This article collects some of my lessons-learned mostly for my own purposes if I need to do it again, but others may find it useful too. The goal is to use as much free software as possible and low cost and readily available tools and adapters.
My toolkit (not all of this required for all the conversions - Links are examples only):
- Mac Computer - It basically comes out of the box with all the required software except Avidemux
- Avidemux software - To correct aspect ratio issues (16:9 - 4:3) without re-encoding
- elgato HD60 S+ - Capture card from HDMI to the computer, expensive but the best I've found so far
- AV2HDMI Converter - Turns analog video into HDMI
- SCART to RCA - Output from PAL VCRs to RCA for the item #4 above
- SCART to HDMI - An alternative for #4 and #5 above if you will only be using SCART
- Firewire / IEEE1394 4pin to 6pin adapter - Cameras with Firewire have 4 pin ports
- Firewire 400 to 800 adapter - More recent computers will need to convert from Firewire 800
- Thunderbolt to Firewire adapter - More recent computers will have a Thunderbolt port instead of Firewire
- Thunderbolt 3 to Thunderbolt 2 adapter - Most recent computers have Thunderbolt 3 instead of 2
- Chunghop RM-991 - A super versatile multi-remote that can control all sorts of old equipment where the remotes are lost/broken (see Manual)
- Optional / Extra Credit - an SDR such as a HackRF (see bottom of article for why) (or TL;DR)
Note: For items 4-8 just make sure to get the right gender and whatever interconnecting cables you need.
Also Note: A straight Firewire-USB cable (without an active adapter) to replace items 7-10 such as this item WILL NOT WORK. You need conversion circuitry not just a straight through cable.
In addition you will also need:
- Playback equipment for your media - this is getting harder and more expensive to find
- Head cleaning equipment (I use 99.8% Isopropyl Alcohol + printhead cleaning sponge)
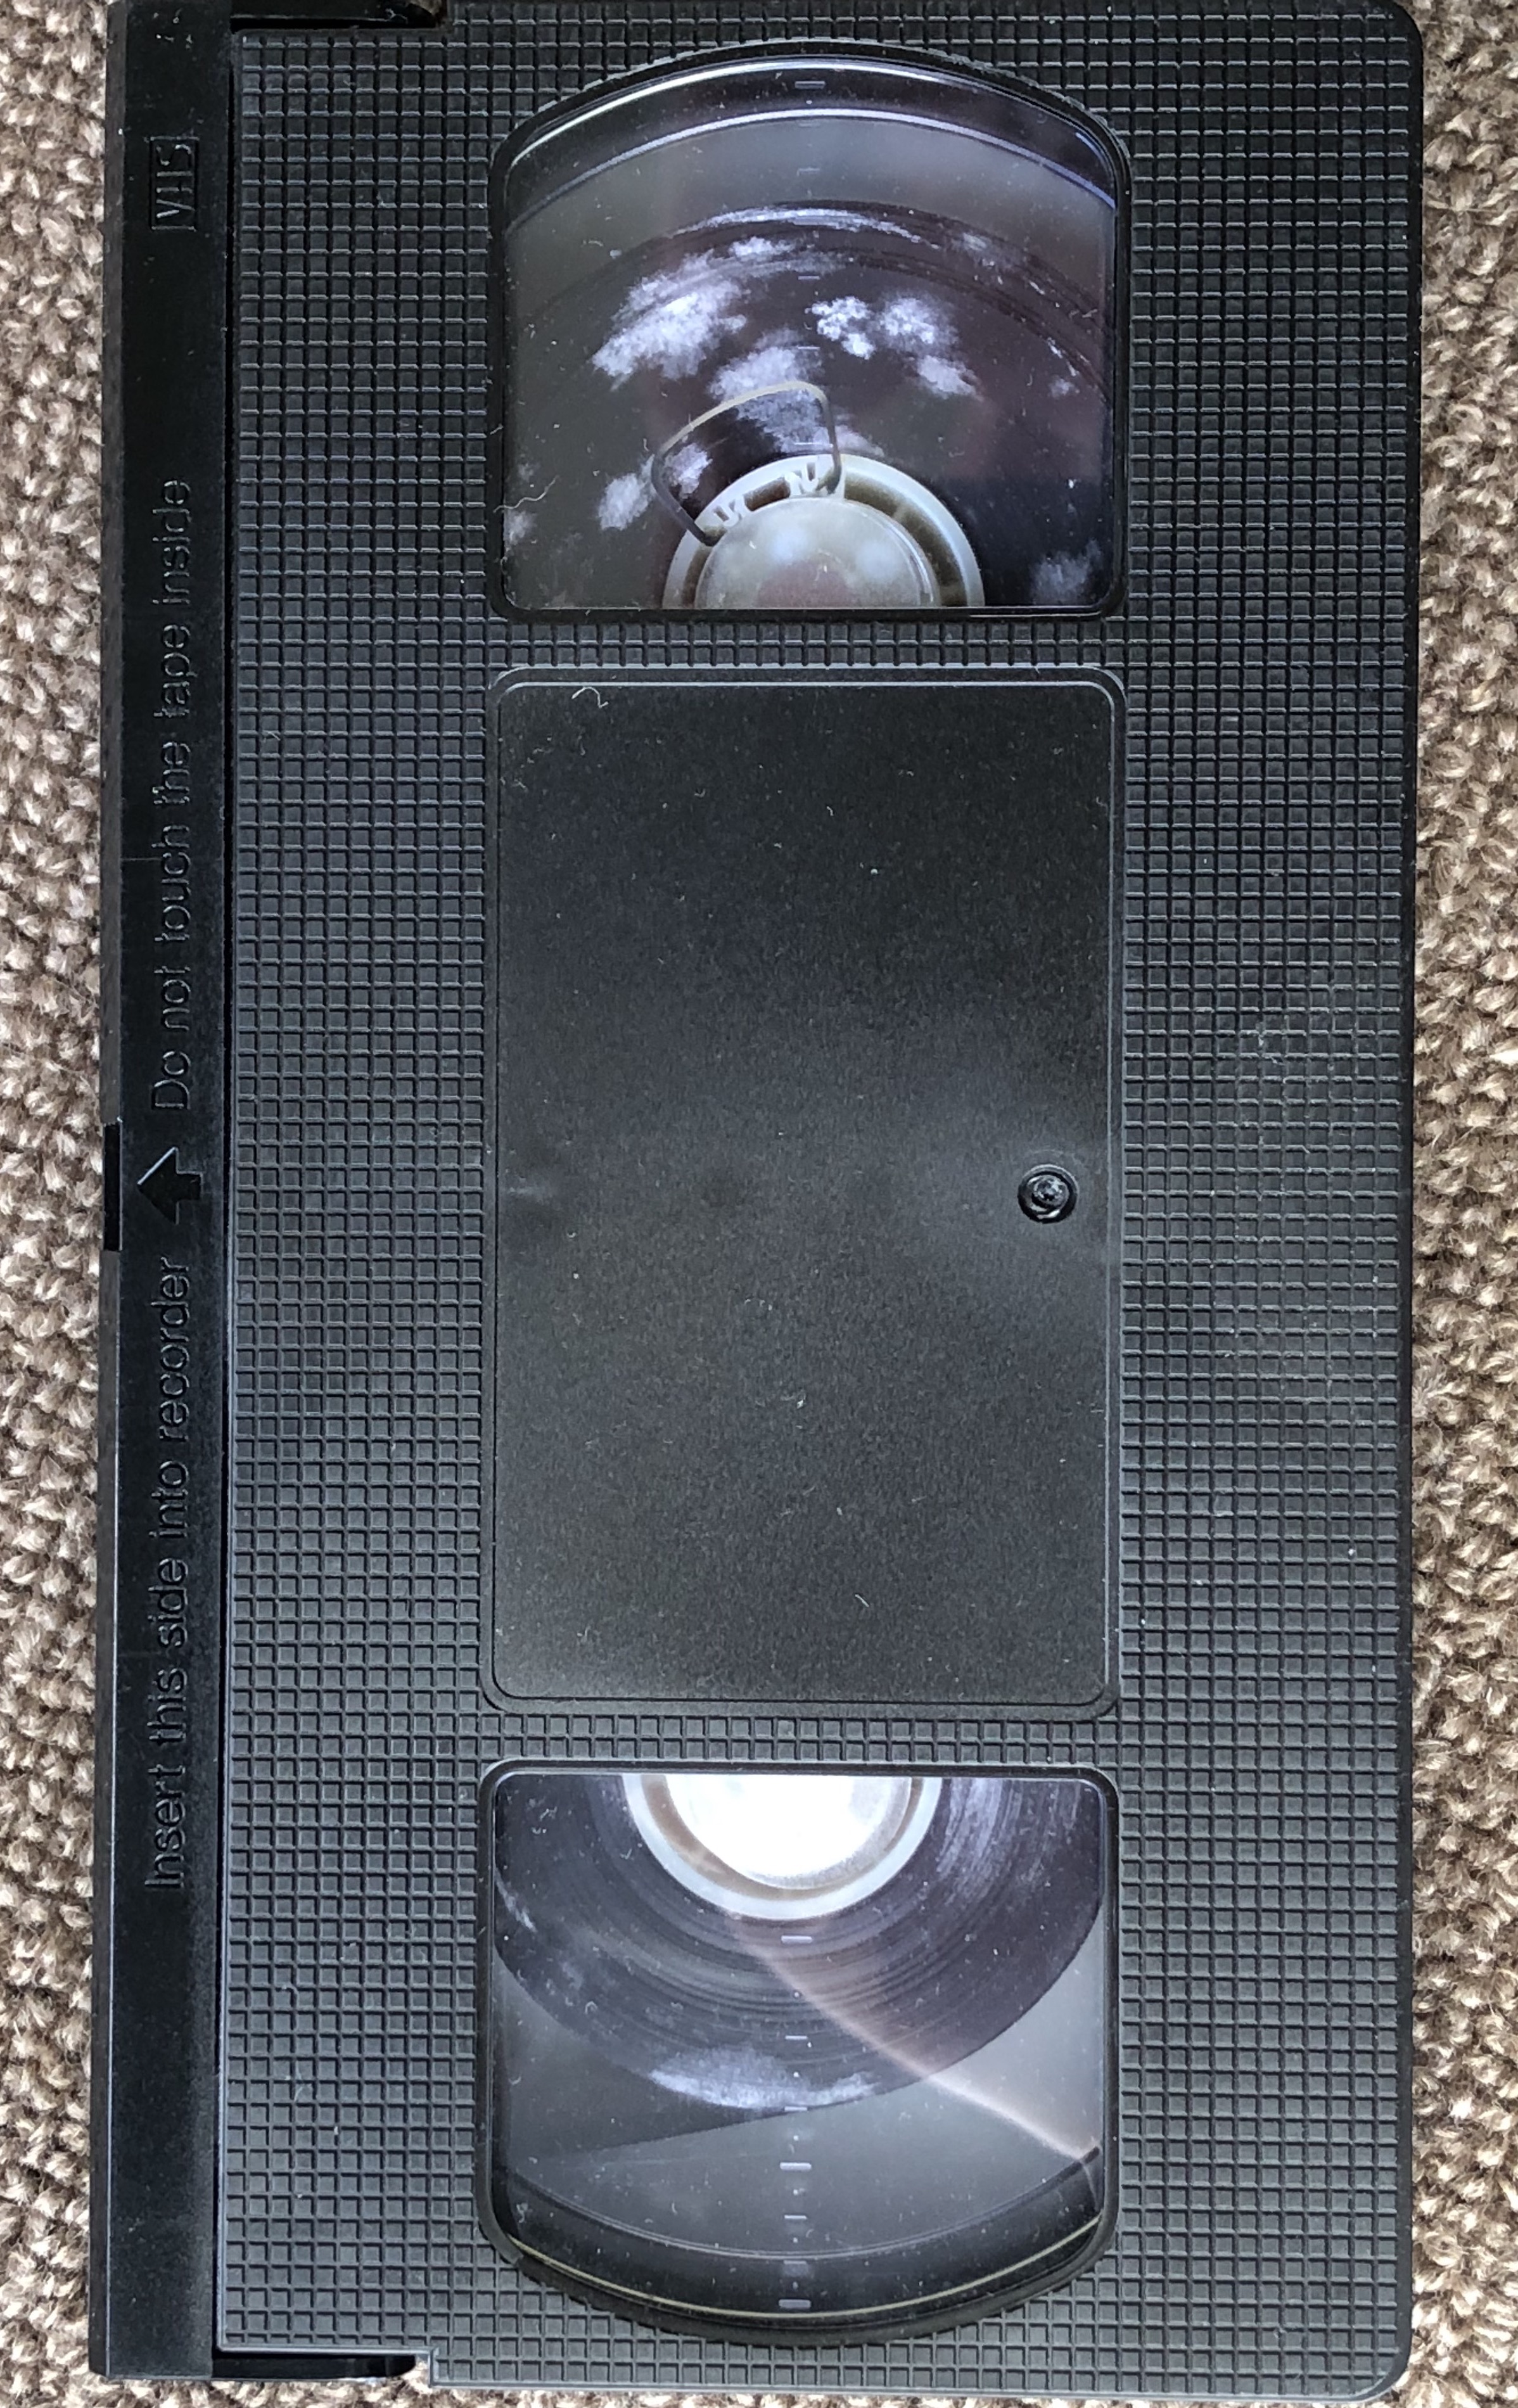
Before starting you should assess the condition of the tapes. Older ones can have Sticky Shed Syndrome, be affected by mould (see photo) or have other types of degradation.
I have found that doing a 'tape stretch" procedure really helps avoid problems when playing tapes that have been untouched for a long time. Simply insert the tape, fast-forward to the end and then rewind to the beginning. This will free up any sticky sections of tape BUT you may also rip a tape doing this procedure. There are many videos on Youtube showing how to repair this. I normally just use normal Scotch Tape.
You also want to make sure the heads and the entire tape path is clean. (I use 99.8% Isopropyl Alcohol + printhead cleaning sponge)
The tape on the left was so mouldy that it also shed a lot of mould inside the player - not good. I was able to clean it up, but an alternative is to find a tape winder which saves the actual player from all the wear and tear and dirt.
I'll start with the easiest first. This would be anything that is already on a device which has a digital output.
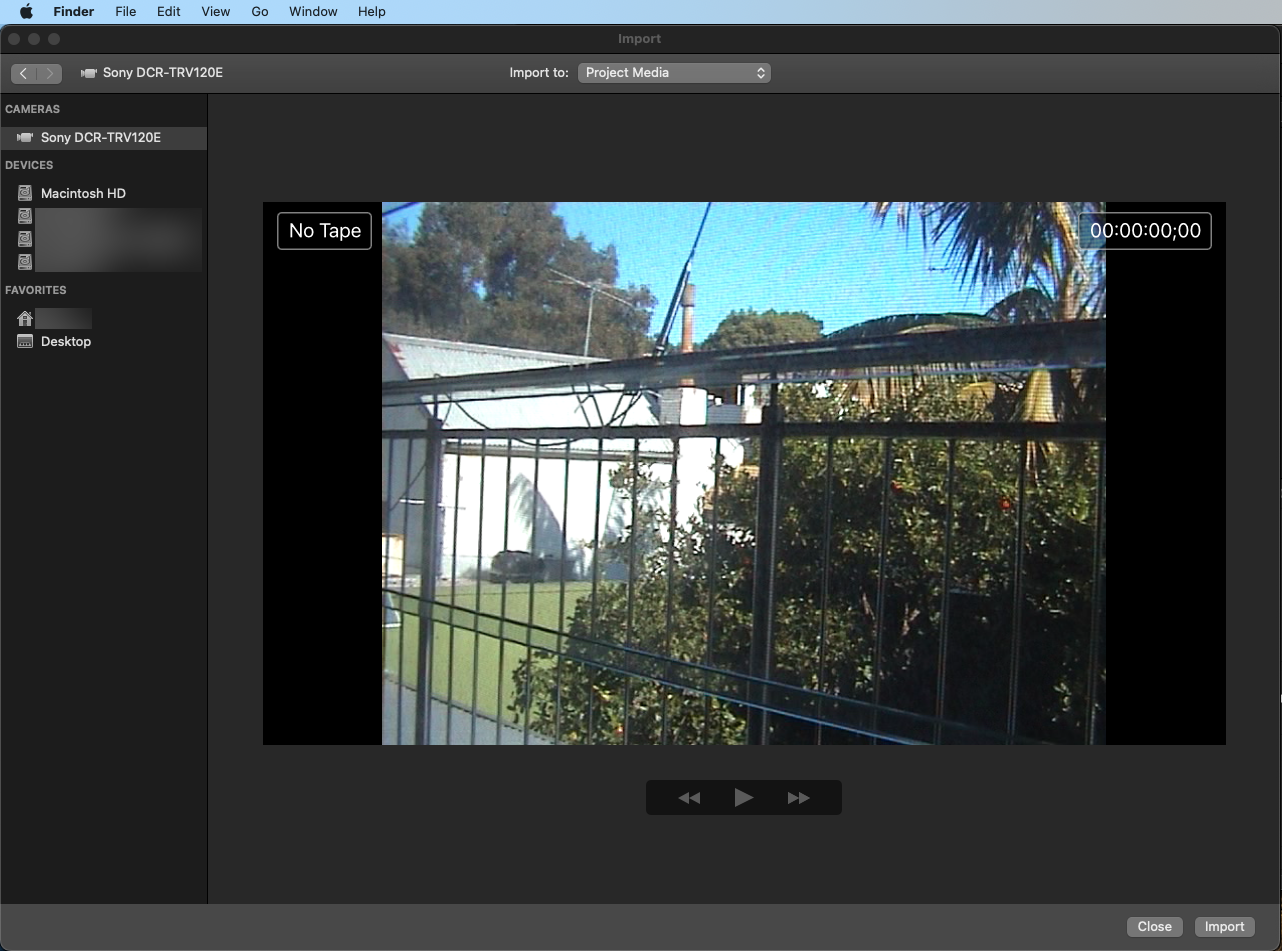
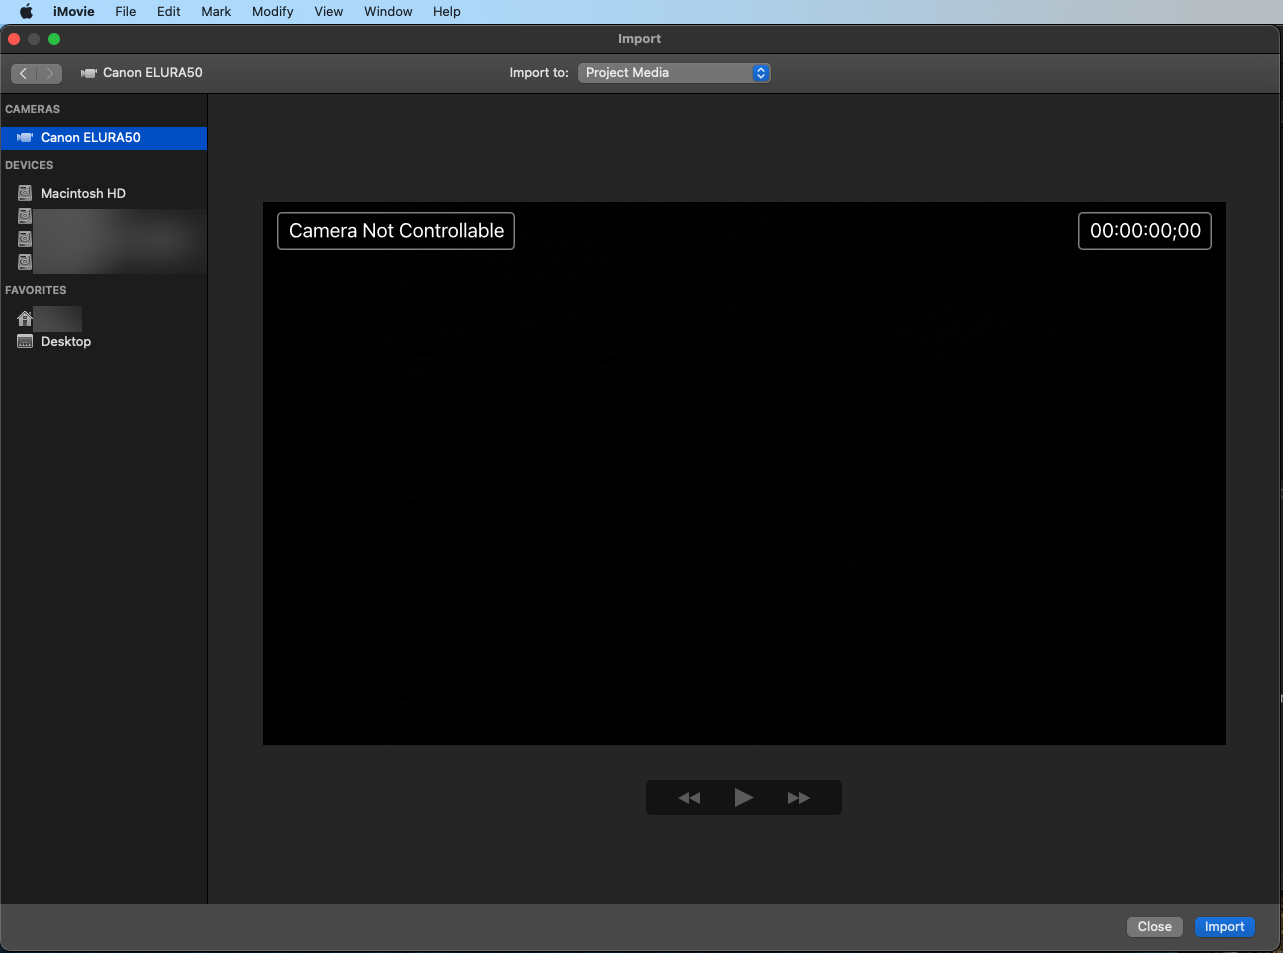
In my case I had a Sony TRV120E (PAL, Video8, Hi8, Digital8), Sony DCR-HC52 (NTSC, MiniDV) and Canon Elura 50 (NTSC, MiniDV). While the MiniDV and Digital8 content is already digital, the nice thing about the Sony TRV120E is that it will play the analog Video8 and Hi8 tapes out through the digital port and it saves you needing any additional equipment.
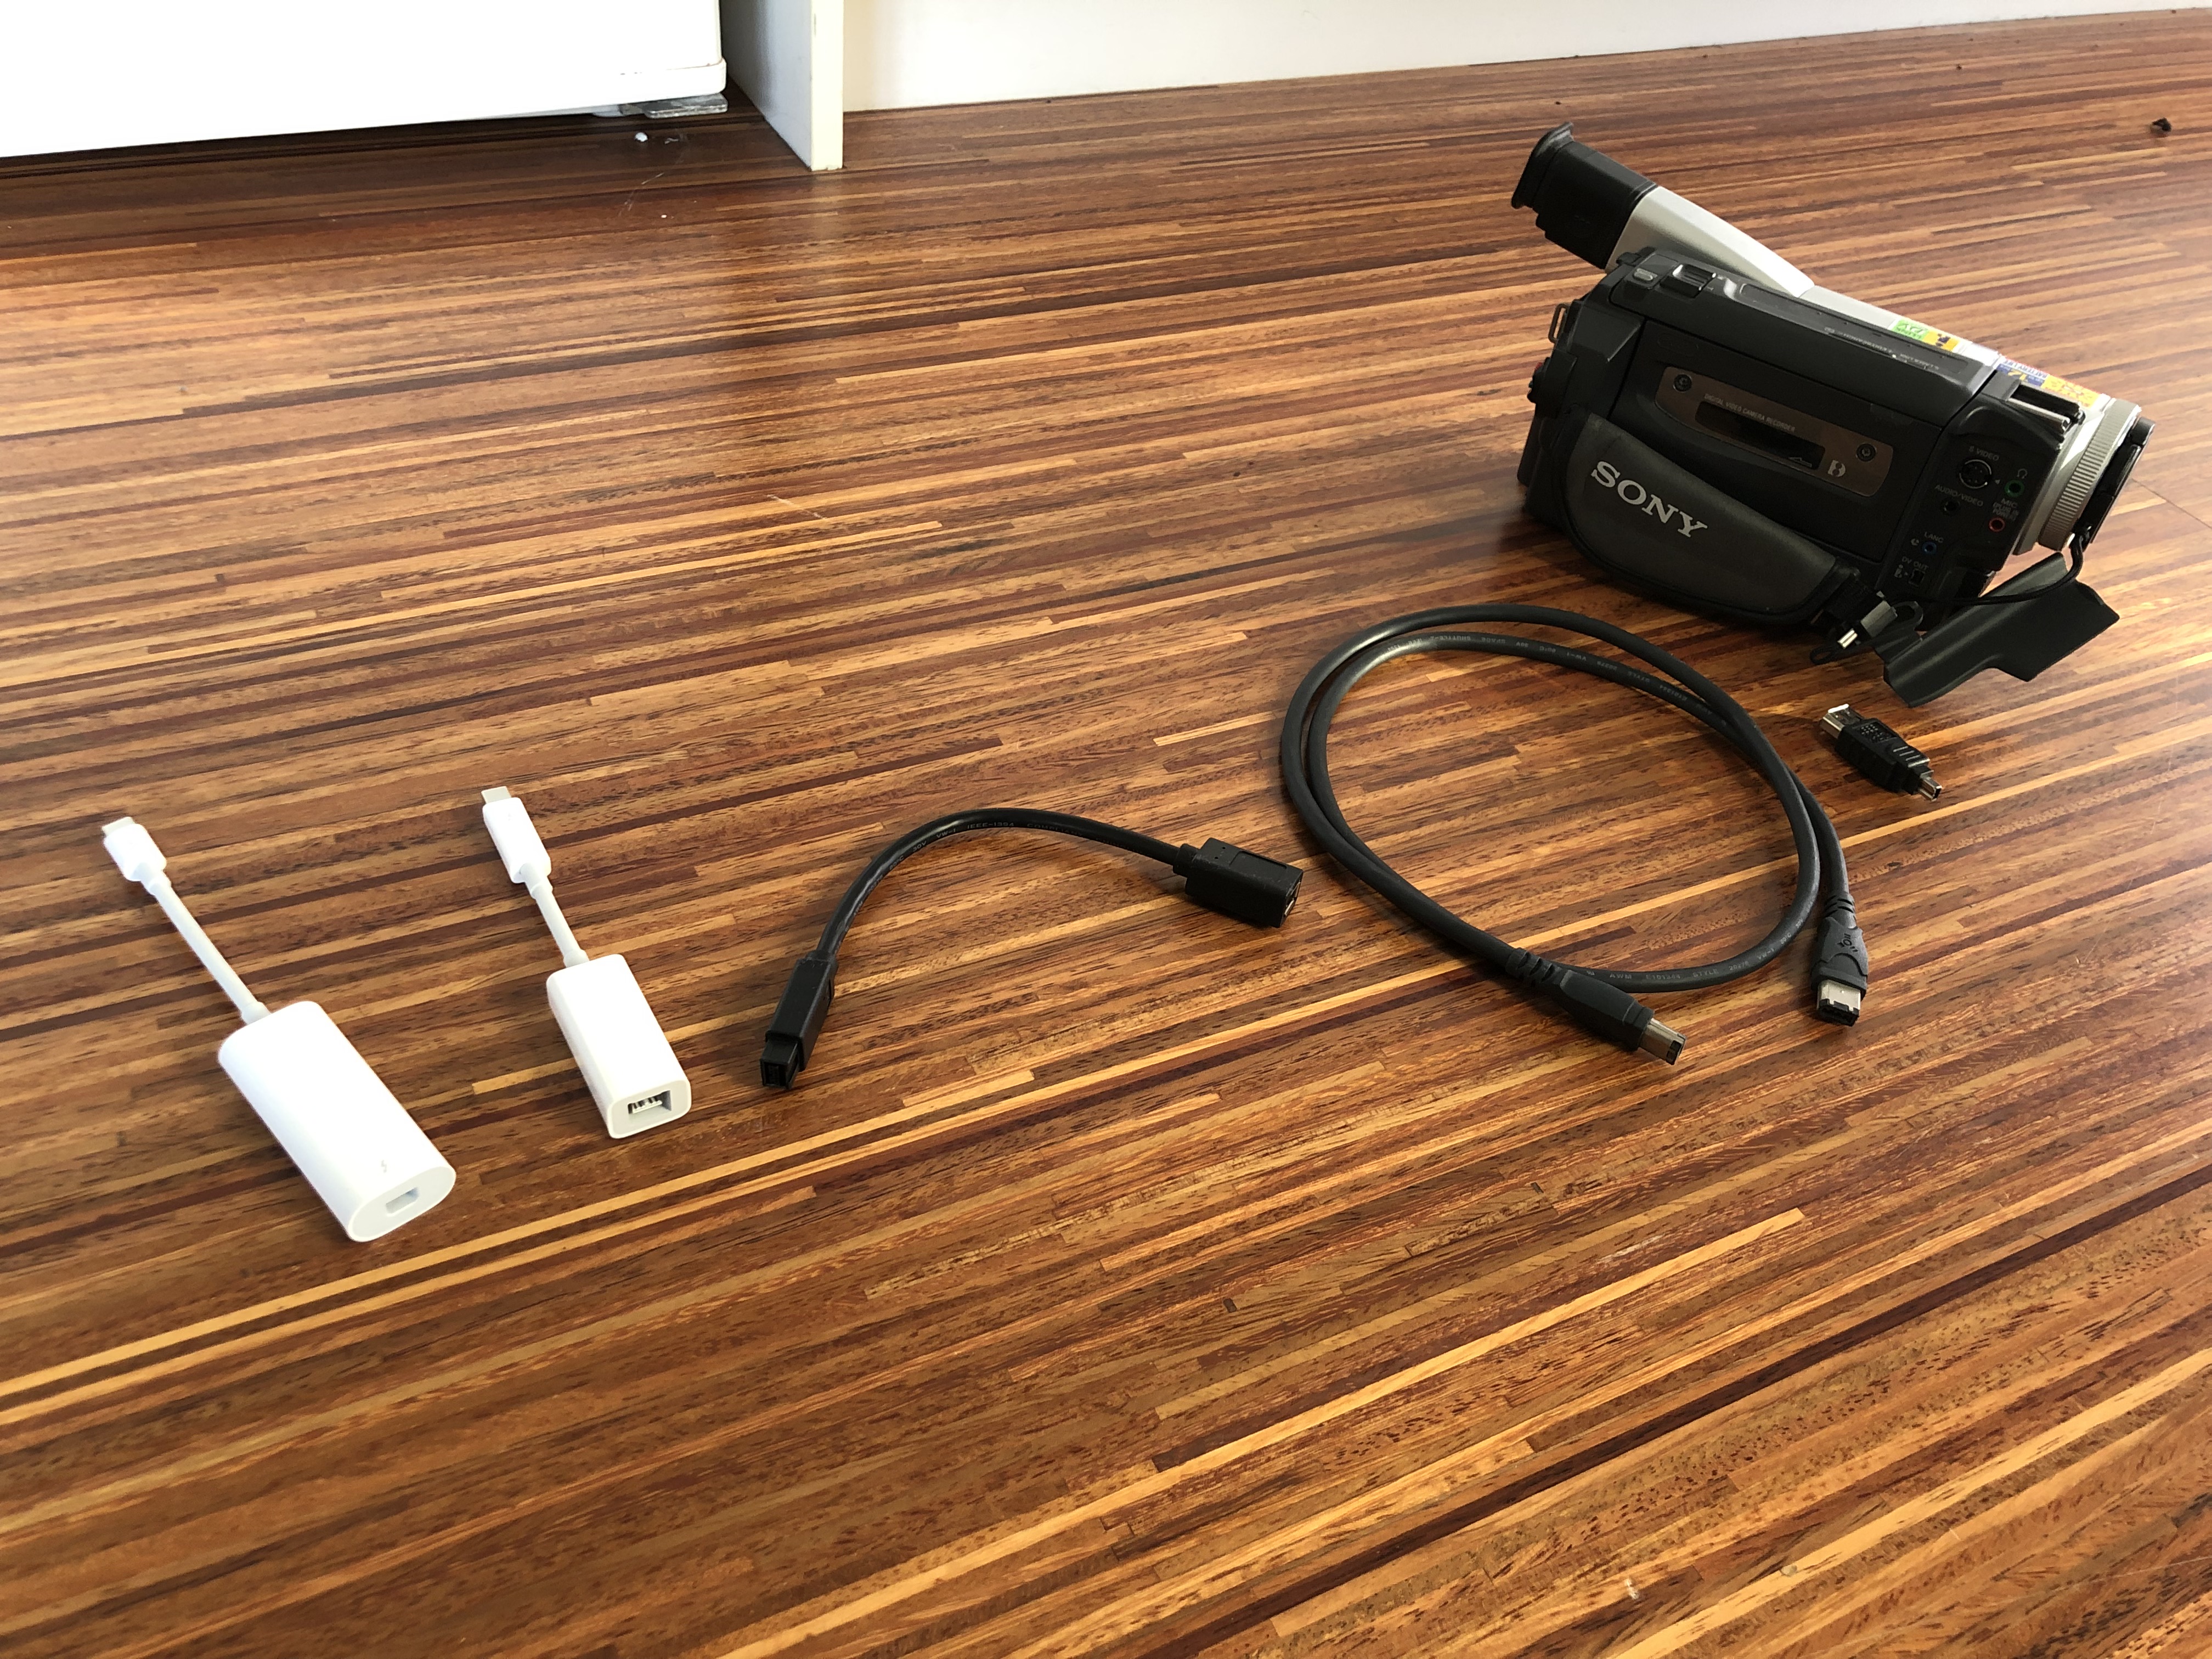
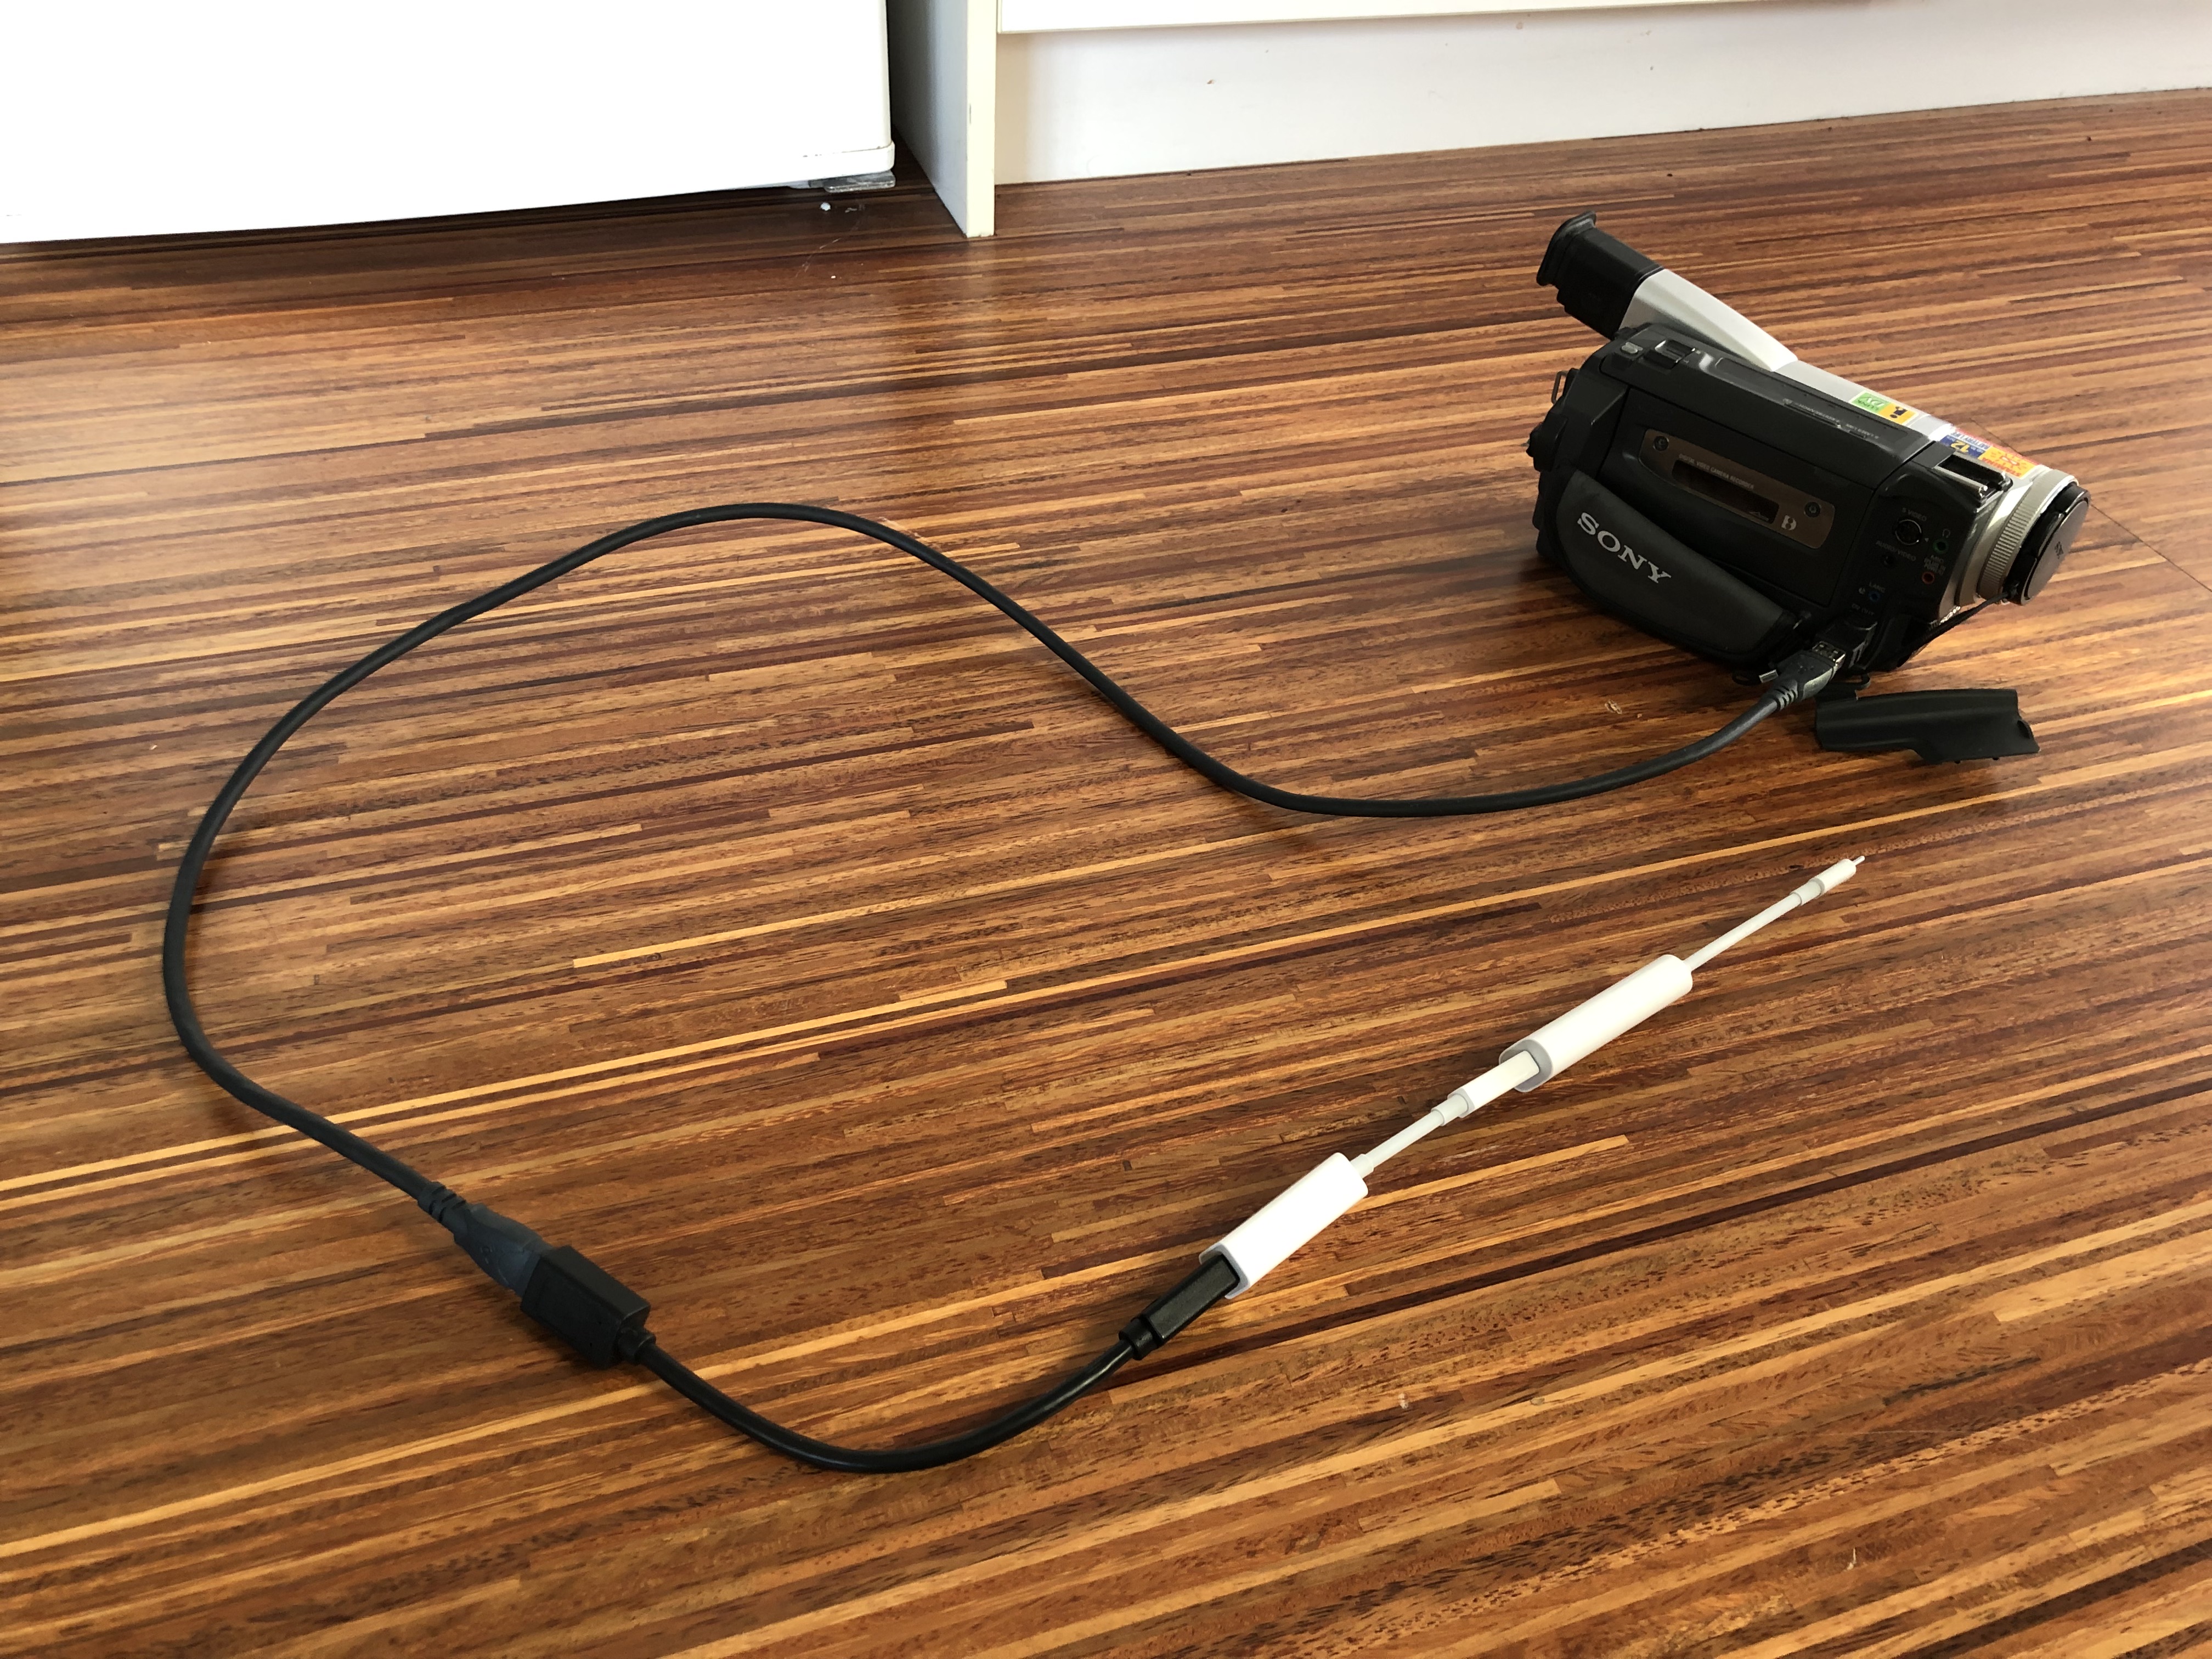
Click on one of the images to enlarge, but basically you connect them all up in sequnce to make it Thunderbolt 3 (which physically looks like USB-C). If you have an older Mac you may already have a Thunderbolt 2 port in which case you wouldn't need the last adapter.
Electrically hooking it all up is a breeze. You just need the items above #7, #8, #9 and #10
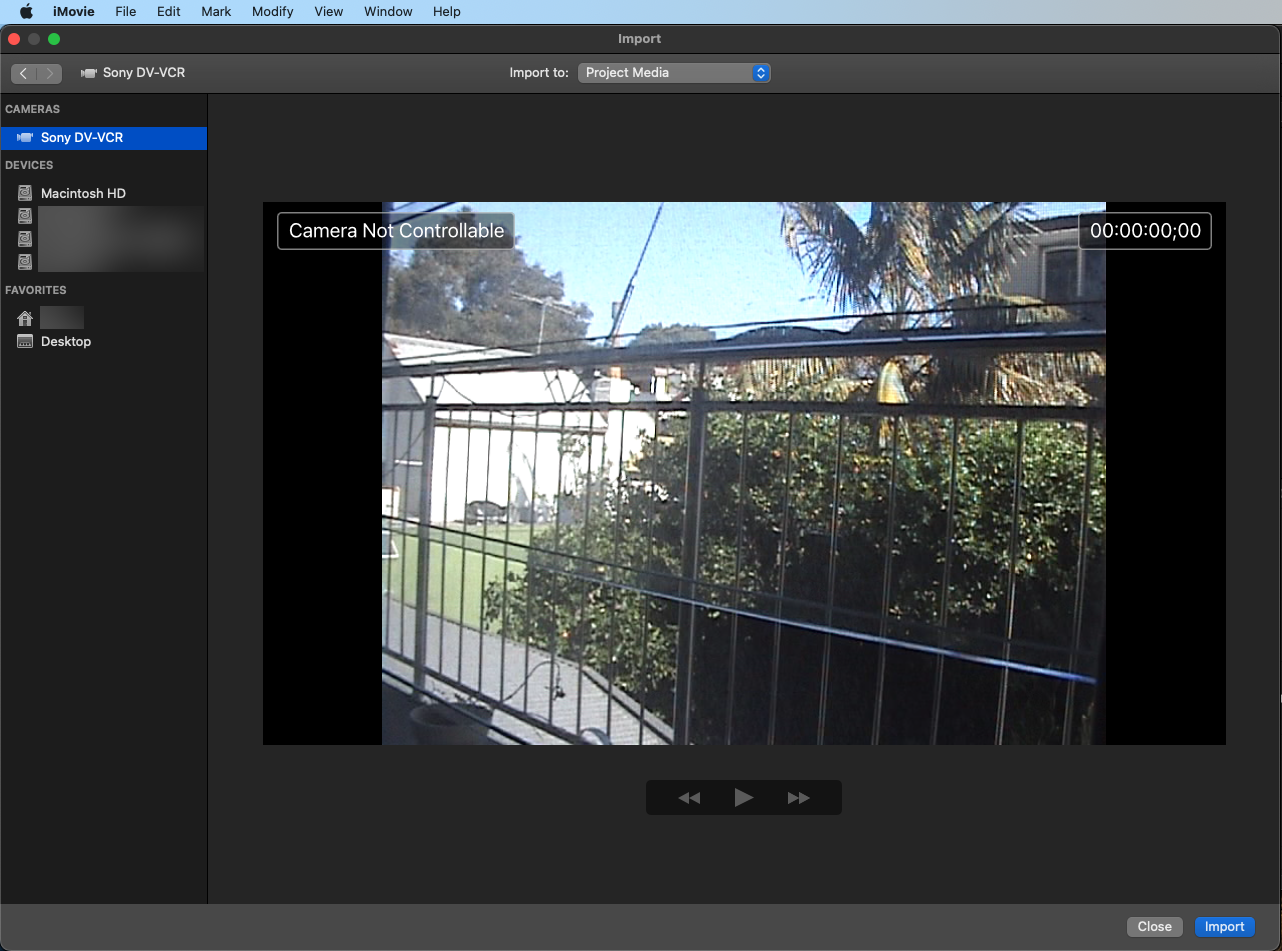
Something I thought was really cool is that all three of my cameras were just plug and play (a new M1-based Macbook that is 20+ years younger than the camera it is connecting to, but can still recognise it). The Mac natively comes wtih iMovie and you simply go to File then Import Media. The model of the camera is correctly enumerated on the top left. Some cameras had "Camera Not Controllable" in which case you Play/Pause/Wind on the camera itself and others allowed you to do it with the buttons on the screen. You then just click the blue Import button on the bottom right and that's it!
The 4-conductor Firewire 400 port has different names on different cameras. It can be called i.LINK (as it is on my Sony cameras) and on the Canon camera it was simply called DV.
You will notice that the files produced by copying the tapes this way are incredibly large. My personal preference is to save a copy of this original extract for the future. There will be better codecs and image processing software in the future and I feel it's best to keep the raw original as the basis for any future processing. However, you will probably want to extract and share some of the footage - in which case iMove lets you slice and dice it as you wish, then use the Export fumction to save it using a more modern format (h.265/HEVC if your device supports it or h.264 for greatest compatibility). This step dramatically reduces the file size but also it's a "lossy" process and that's why I alwasy also keep the originals.
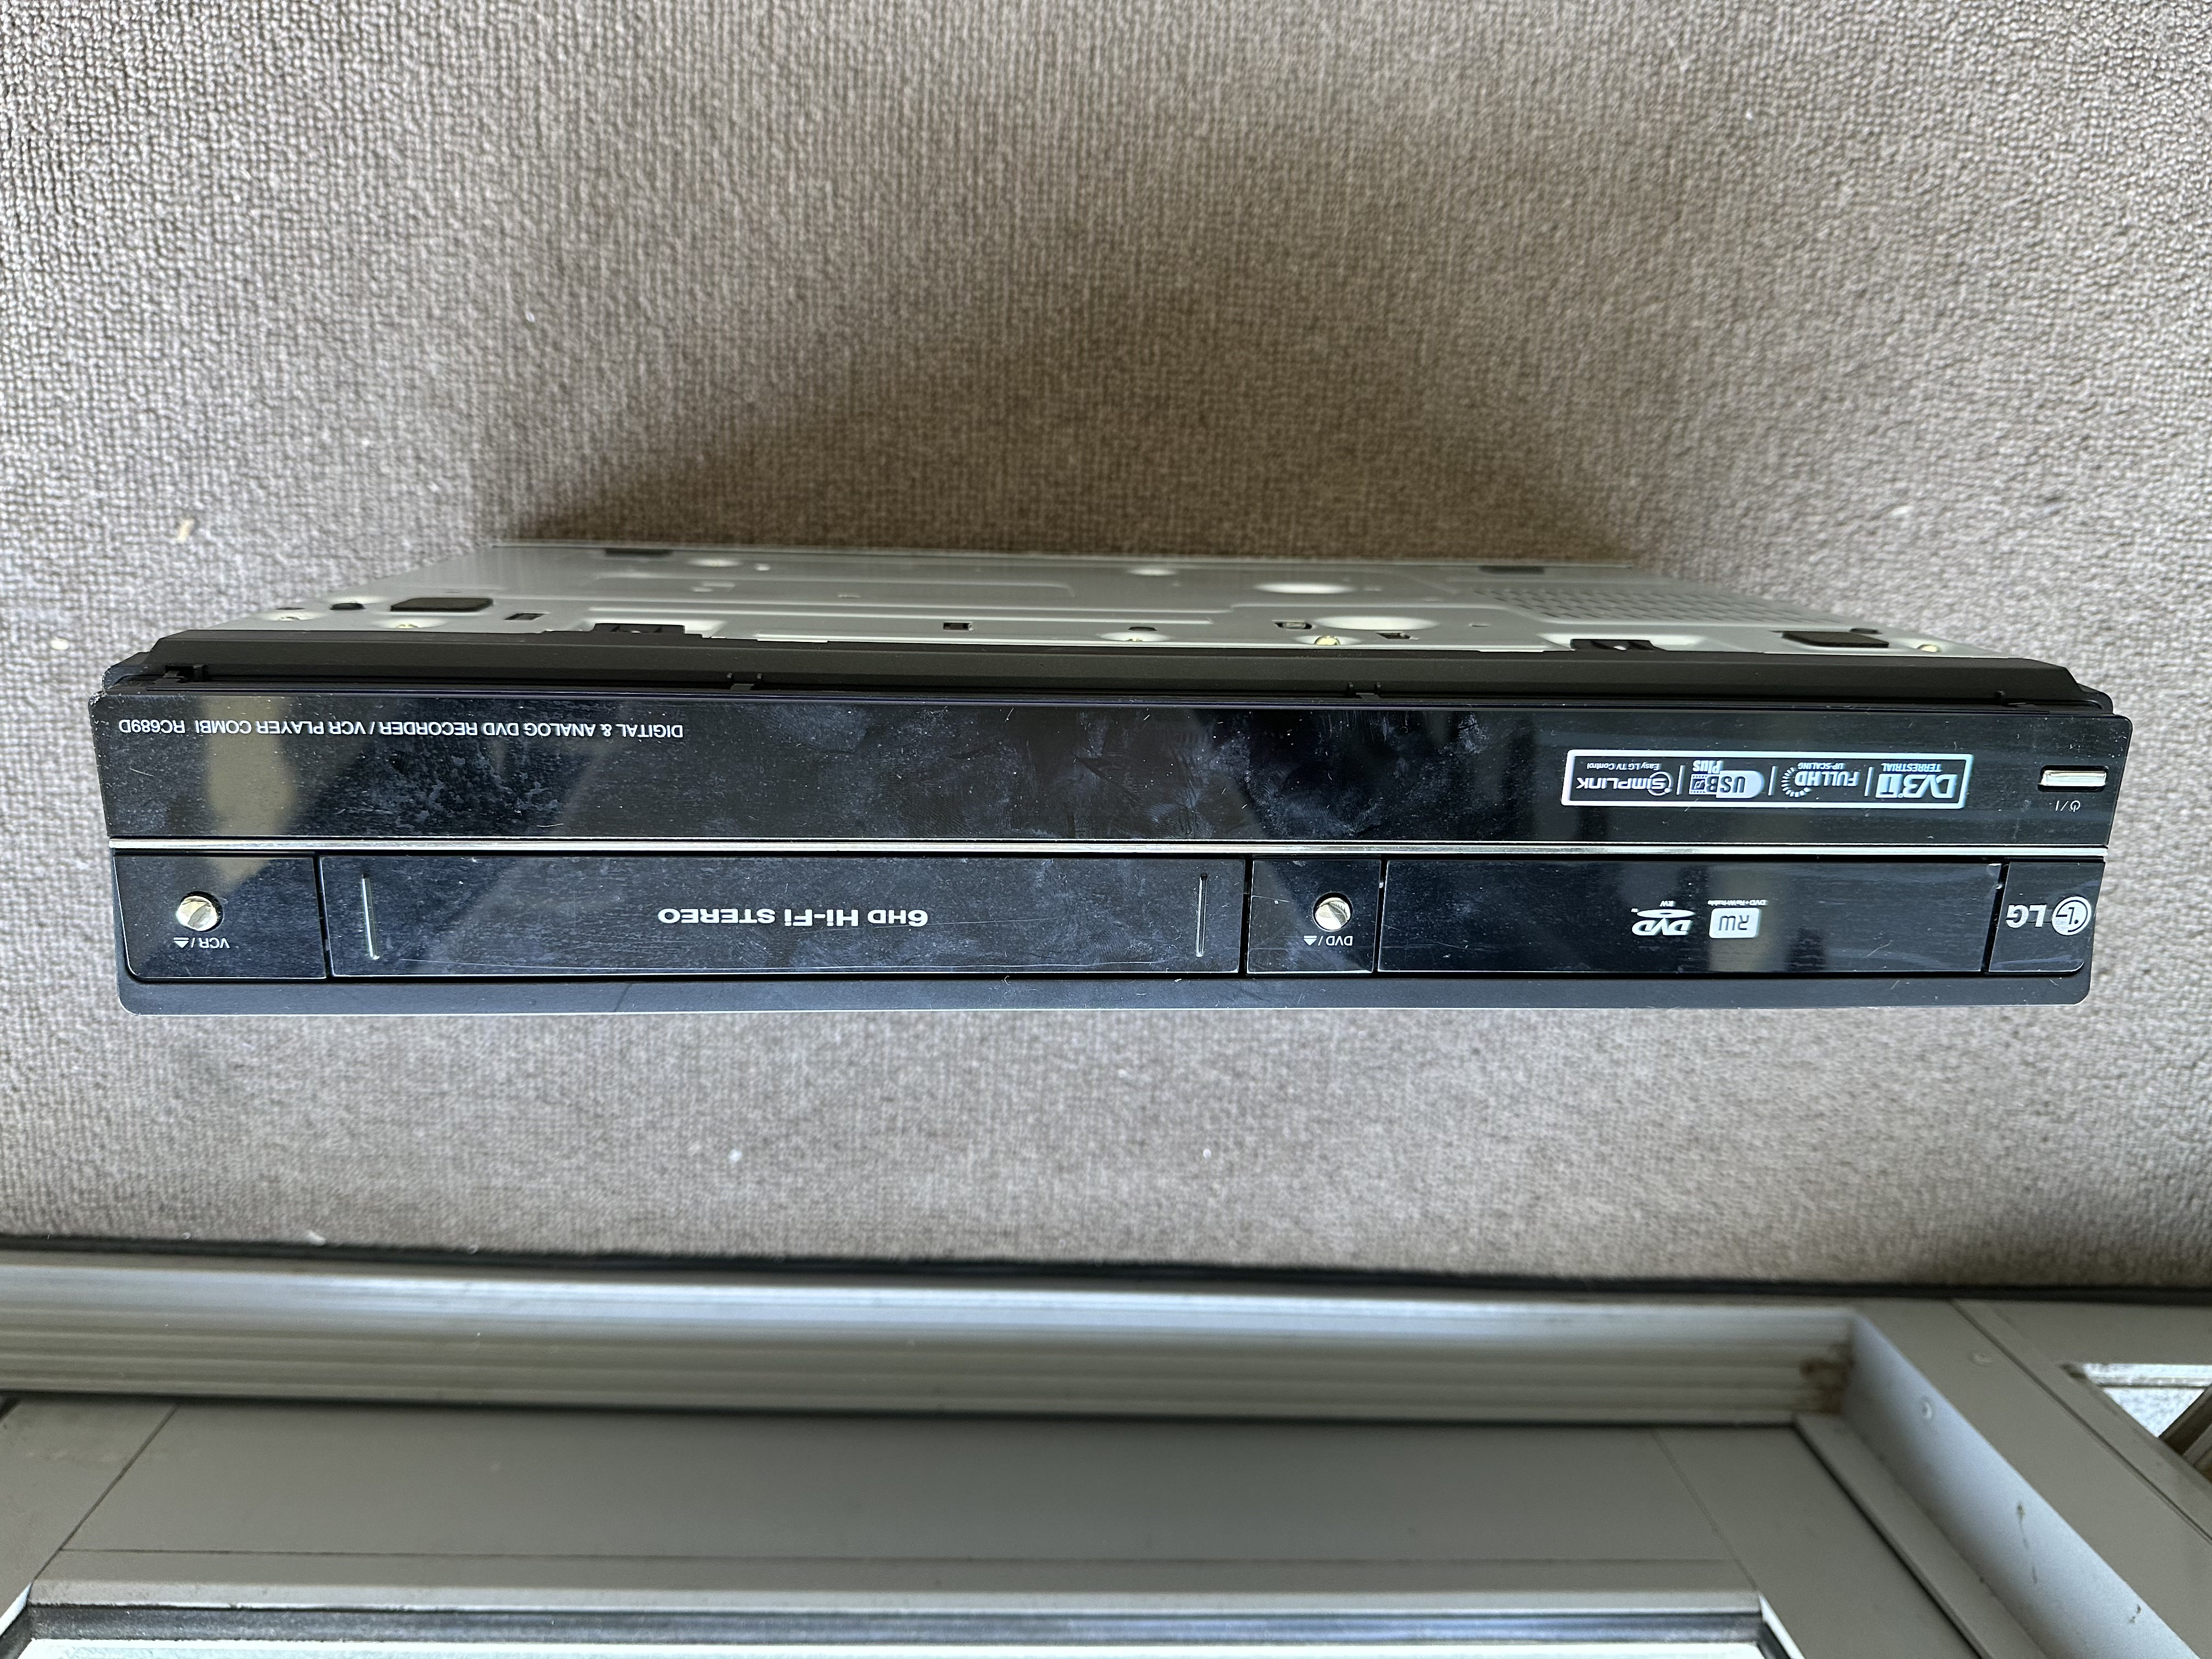
Moving onto slightly harder stuff is to digitise things that exist only in analog form. Here I'm using a few different video sources. I have a top-loading Panasonic PV-8000 (NTSC, VHS), a Panasonic NV-HD630 (PAL, VHS) and an Aiwa HV-MX1 (NTSC + PAL + MESECAM, VHS). For NTSC 8mm/Hi8 I use a Sony CCD-TR700. For VHS, I find the top loader easier to clean and less jam-prone, but they are incredibly rare these days. I did have trouble converting an old MESECAM tape (with some interesting news footage of the 1989 Romanian Revolution) that I could only read using a borrowed LG RC689D. The nice thing about the RC689D (Back Picture)/(Front Picture) is that it has a built in HDMI out so it could go straight into the HD60S+. The audio signal had to come out of the RC689D separately and into the analog audio in port of the HD60S+.
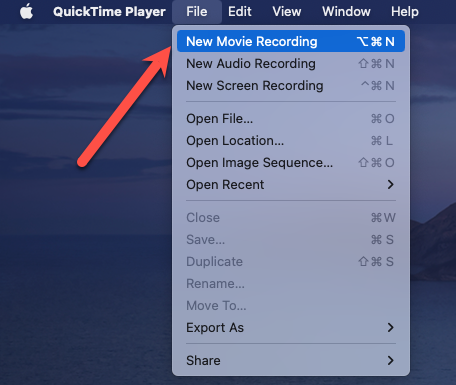
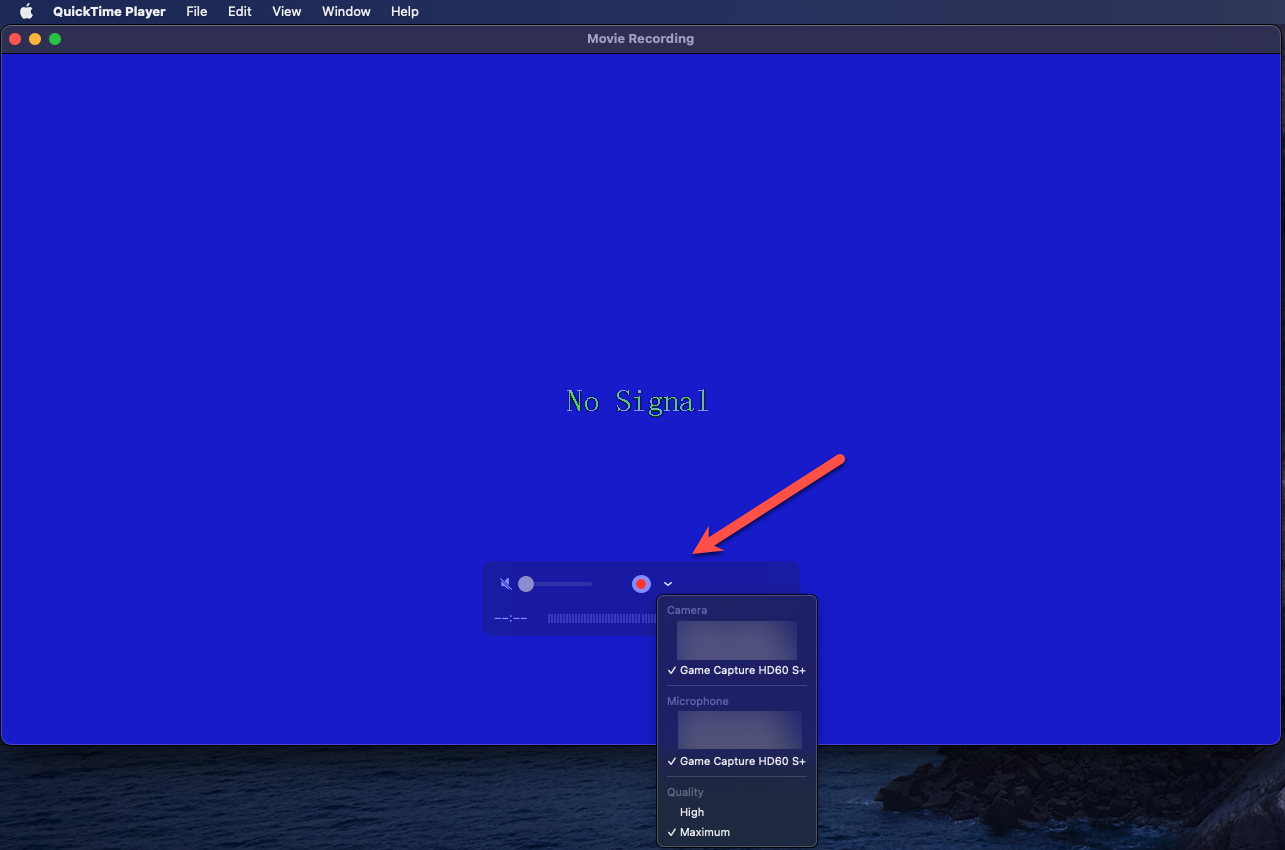
The process is to use either RCA or a SCART-to-RCA cable to plug into the AV2HDMI converter (see item 4 of my toolkit above) then use an HDMI cable into the elgato HD 60S+ and then USB 3 into the computer. On the computer side, the elgato native software is actually quite lousy, and instead I just use QuickTime Player which comes for free on every Mac. While the name doesn't imply a recording capability, all you do is load QuickTime Player in the Applications folder then hit cancel when the file menu comes up.Then on the top menu, click File -> New Movie Recording and then you can select the HD 60S+ in the little dropdown menu next to the Record button (click on the images to the right to expand).
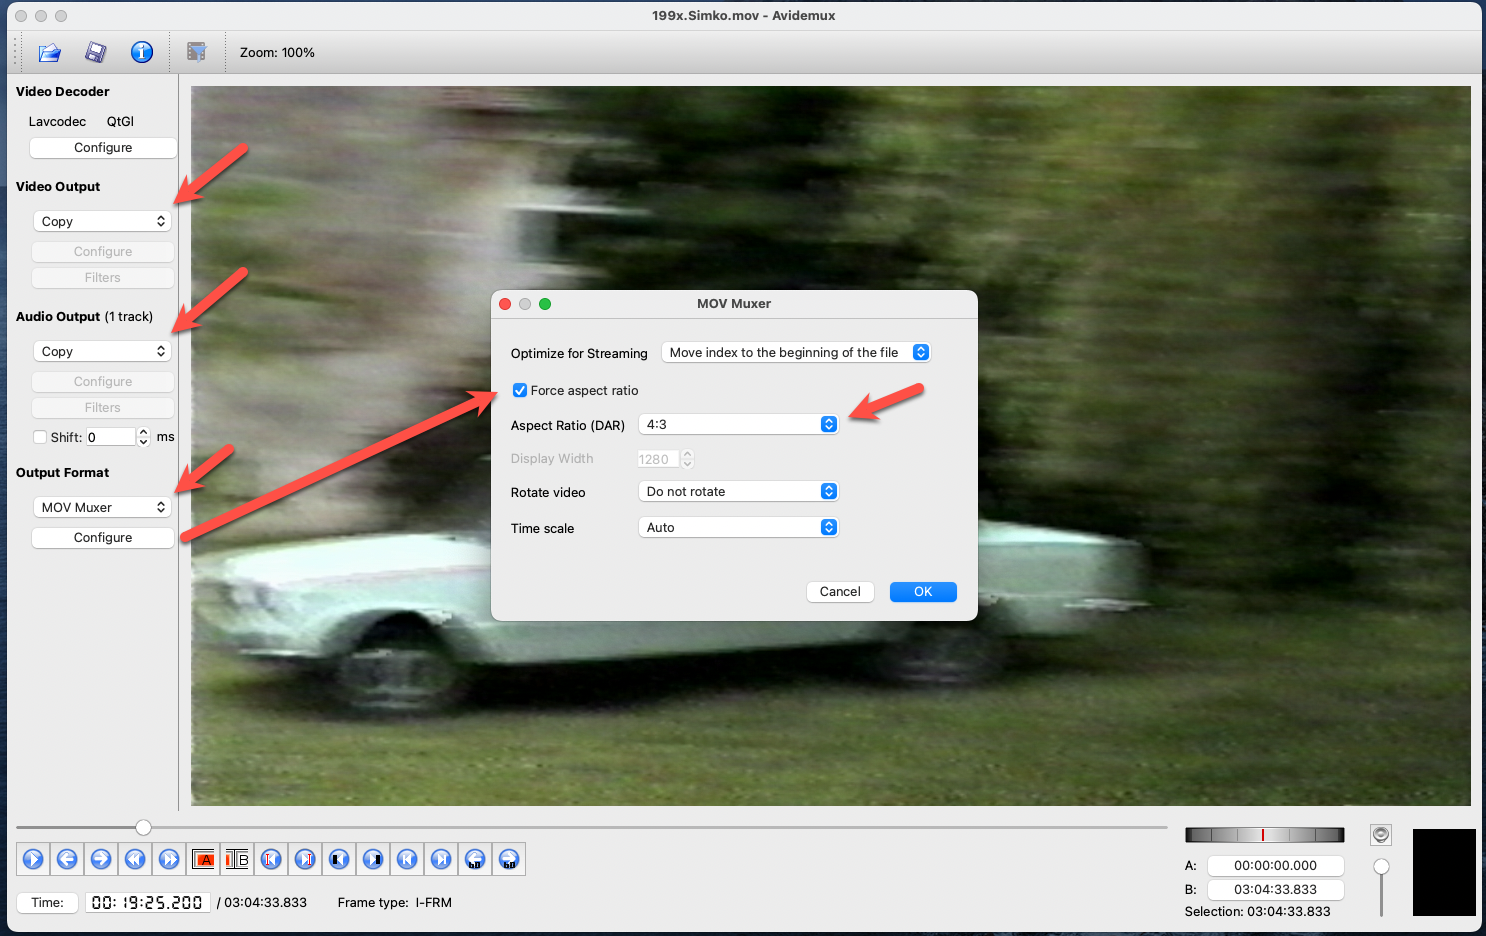
The resulting file from QuickTime will be a .mov file but will be in the wrong aspect ratio since the AV2HDMI converter is stretching the video when it is upscaling it to 1080p. The great thing about Avidemux is that you can push it back to the native 4:3 format without re-encoding the video (and thus losing more quality). Just load the .mov into Avidemux and for Video/Audio output select the COPY option (so that it's not transcoded) and then for the output format select .MOV and then click Configure and Force 4:3. This process is really fast without the need for more processing.
If you've made it this far, well done.
You must be thinking, isn't this a radio-themed site? Where is the radio aspect of this? Well, you can use an SDR that you probably have lying around to directly do this (though I would suggest at lower quality). This could be a great option where you no longer have fully working playback equipment in the right format but have an ability to pull the signal off the tape. This is done via a plugin to SDR# and there is a great article here to get you started down the rabbit hole of this option: https://www.rtl-sdr.com/new-sdr-plugin-pal-secam-tv/
If you really want to go down the rabbit hole on this topic, check out the Matt's TV Barn YouTube channel.
Posted: 10-Aug-2022
Updated 7-Jul-2023